How to setup dmarc
How to Avoid Landing in Spam: Best Practices for Email Marketing
Email marketing is a great way to stay in touch with your customers and promote your business. But if your emails end up in the spam folder, all your hard work is for nothing. So, how do you avoid landing in spam? Here are a few best practices:
1. Set up a dedicated email sending domain
A dedicated email-sending domain is a private domain you use to send and receive emails. It is different from the shared domain that is provided for all users.
Why is a dedicated email-sending domain important? Because if you don’t have one, your emails are more likely to go to spam, even if you follow good email practices. When you have a dedicated email-sending domain, you can control your reputation and email deliverability. This means that you can work to get all of your emails delivered to the inbox instead of the spam folder.
How to set it up: We need access to your domain provider, and we will set it up for you.
2. Enable email validation
Email validation checks if the email address you are sending to is valid. Sending to an invalid email address can negatively impact your email deliverability.
Why is email validation important? Because if you send emails to invalid email addresses, it harms your domain reputation and can lead to your emails going to spam or not being accepted into the mailbox.
How to enable email validation: We can add this upon request.
3. Enable “Mark Email Invalid from Hard Bounce”
An email bounce is when an email is not delivered or rejected by the recipient’s email provider. There are two types of bounces:
- Hard bounce: This occurs when an email address does not exist.
- Soft bounce: This is a temporary failure caused by the recipient’s servers being down or their mailbox being full.
Why is it important to enable “Mark Email Invalid from Hard Bounce”? Because too many bounced emails will harm your domain reputation, and can lead to your emails going to spam.
How to enable it: Go to your Business Profile and scroll to the “Mark Emails as invalid due to Hard Bounce” checkbox.
4. Add your DMARC record
A DMARC record tells receiving servers how to handle incoming mail. Messages must pass DKIM and SPF alignment checks to be delivered, according to the requirements set in the DMARC policy. Messages that fail DMARC checks can be rejected, reported back to the domain owner, or quarantined.
Why is it important to add a DMARC record? Because not having one can negatively impact your domain reputation and email deliverability. Mailbox providers often count it against you when DMARC records are not set up properly, and your emails may end up in spam.
How to add a DMARC record: We can add this for you on request.
If you want to do this yourself, here are the instructions:
- Add a TXT record to your DNS settings for your DMARC policy.
- Type: TXT
- Name: _dmarc
- Content: v=DMARC1; p=reject
5. Use the proper “From email”
The “From email” is the email address that the recipient will see when they receive your email. For example, your sending domain might be m.eztransition.com, but you can send your “From email” as [email protected]. It is even better to send from [email protected]. Do not send from a personal email address like [email protected].
Why is it important to use the proper “From email”? Because using a “From email” that does not match the primary domain you are sending from can result in poor email deliverability. Email providers see this as “spoofing” your address.
How to set it up: Whenever you are sending from EZMS, be sure that your “From email” has your primary domain in it. For example, if you set up replies.yourcompany.com, you can send from [email protected].
Here is an example:
- Sending domain:
mail.yourcompany.com - Proper “From email”:
[email protected] - Improper “From email”:
[email protected]
6. Unsubscribe Links: Your Email Safety Valve
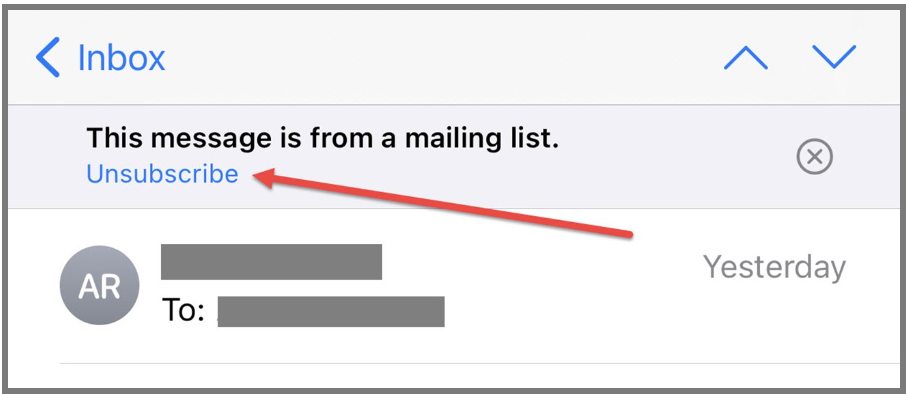
What is it? An unsubscribe link is like an exit door for your email recipients. It allows them to opt out of receiving further emails from you if they choose to do so.
Why it Matters? Not having an unsubscribe link can severely dent your email deliverability rates. In fact, it’s more than just a best practice – it’s a legal requirement to include an unsubscribe link in every marketing email.
How to Set It Up? There are two user-friendly ways to get an unsubscribe link within EZMS. Your first option is to use the default unsubscribe link that we’ve conveniently set up for you. Alternatively, you can take matters into your own hands and manually add one to the footer of each email you create.
But here’s a pro tip: If you opt for the default list-unsubscribe-header, it’s the preferred method for many email providers. However, it comes with a caveat – it conspicuously marks your email as promotional in Gmail, consigning it to the “promotions” tab. Plus, it features a user-friendly unsubscribe button right at the email’s top. Be prepared for more unsubscribes, but that can be a blessing in disguise – these folks might not have been engaging with your emails anyway, and culling them can improve your long-term deliverability rates.
Now, there’s talk that industry requirements may eventually favor Option 1. But for now, Option 2 is your go-to. This involves manually embedding an unsubscribe link in your email footer. We recommend creating a standard template with this link and duplicating it for every new email. The bonus? It automatically marks users as “Do not disturb” for email only, ensuring they won’t receive further messages. If you need assistance setting up this template, just let us know, and we’ll take care of it for you.
7. Maintain an 80:20 text-to-image ratio
Maintaining an 80:20 text-to-image ratio in your emails is essential for several reasons:
- Spam filters: Spam filters often flag emails with heavy images as potential spam. This is because spammers tend to use images to hide their text. To avoid being marked as spam, it’s best to keep your text-to-image ratio balanced.
- Image blocking: Many email clients block images by default, requiring users to click to display them. If your email is image-heavy, there’s a risk that recipients may not see your content at all until they take action to display the images.
- Accessibility: Emails should be accessible to all users, including those who use voice assistants to read emails. Voice assistants may not recognize alt text, so emails with heavy images may appear blank to these users. Additionally, text within images won’t appear in email search results.
- Reader preferences: Some readers disable image visibility in their email clients. Without alt text for imagery, these emails may not convey any message and can appear broken.
Overall, maintaining an 80:20 text-to-image ratio can improve email accessibility, engagement, and deliverability.

8. Use double opt-in
Double opt-in is a process where you ask subscribers to confirm their email address before they start receiving emails from you. This is done by sending them a confirmation email with a link that they need to click on. Only after they have clicked on the link will they be added to your email list.
Why is double opt-in important? Because it helps to ensure that your email list is full of engaged subscribers who actually want to receive your emails. This is important for several reasons:
- It improves your email deliverability. Spam filters are less likely to flag your emails as spam if they know that your subscribers have explicitly opted in to receive them.
- It reduces the number of unsubscribes. Double opt-in helps to weed out people who are not interested in receiving your emails, which can reduce your unsubscribe rate.
- It improves your reputation as a sender. When people know that they can trust you to only send emails to people who want to receive them, it makes them more likely to open and click on your emails.
How to set up double opt-in: Send us an email we can create an automation with a custom double optin flow
9. Stop sending to unengaged emails
Unengaged emails are emails that do not open or click on your links. When you send emails to unengaged subscribers, it can harm your email deliverability. This is because email providers like Gmail and Yahoo see it as a sign that your emails are not relevant or interesting to your subscribers.
There are a few reasons why you should stop sending to unengaged emails:
- It improves your email deliverability. Email providers are more likely to deliver your emails to the inbox of subscribers who are engaged with your content.
- It reduces the number of spam complaints. If your subscribers are not opening or clicking on your emails, they are more likely to mark them as spam. This can damage your reputation as a sender and make it more difficult for your emails to be delivered to the inbox.
If you have been sending to the same person who has not taken action for weeks, send to them less frequently or not at all.
10. Send regularly… but not too regularly
How often you send emails is a delicate balance. You want to send emails often enough to stay top-of-mind with your subscribers, but not so often that they start to ignore you or mark your emails as spam.
A good rule of thumb is to send emails on a regular schedule, but to vary the frequency depending on your subscribers’ engagement levels. For example, you might send a daily email to subscribers who have opened and clicked on your emails in the past week, but only send a weekly email to subscribers who have not been engaged with your content in the past month.
It’s also important to consider your subscribers’ expectations. If you only send out a monthly newsletter, your subscribers may be surprised and annoyed if you suddenly start sending them daily emails. It’s always a good idea to let your subscribers know how often they can expect to receive emails from you.
11. Email warmup
When you first start sending emails from a new domain, it’s important to warm up your domain reputation. This means gradually increasing the number of emails you send over time. This will help to ensure that your emails are delivered to the inbox and not marked as spam.
Here are some tips for warming up your email domain:
- Start by sending a small number of emails to opted-in subscribers.
- Gradually increase the number of emails you send each day and week.
- Avoid sending too many emails at once.
- Send high-quality content that your subscribers will find engaging.
- Monitor your email deliverability and make adjustments as needed.
Here is a specific email warmup schedule that you can follow:
- Week 1: Send 100 emails per day.
- Week 2: Send 300 emails per day.
- Week 3: Send 500 emails per day.
- Week 4: Send 750 emails per day.
- Week 5: Send 1,000 emails per day.
After five weeks, you should be able to send emails at your regular volume without any problems.
Drip mode in EZMS
Drip mode in EZMS allows you to send emails to your subscribers over a period of time. This can be a great way to warm up your email domain or to send a series of emails to your subscribers about a new product or promotion.
To send emails in drip mode, simply create an email automation and select the “Drip” option. You can then specify how often you want to send emails and how long you want the drip campaign to last.
12. Cold Emails: A Cautionary Tale
When we talk about cold emails, we’re referring to emails sent to individuals who haven’t willingly opted in to receive your messages. These lists are often acquired through purchases or scraping.
Why You Shouldn’t Use EZMS for Cold Emails: The short and clear message here is this: Please refrain from sending cold emails using EZMS. It’s not the right tool for this job. In fact, using it for cold outreach may lead to your emails being marked as spam, which could result in providers banning your domain.
Alternative Solutions for Cold Outreach: Cold emailing is its own unique skillset, and this blog post isn’t the place to delve into it. There are dedicated tools and systems designed for cold email campaigns. If you’re considering cold outreach, it’s worth exploring these specialized solutions to ensure your campaigns are both effective and compliant with email best practices.
Conclusion
By following the email best practices and email sending recommendations in this blog post, you can improve your email deliverability, reduce unsubscribes, and protect your domain reputation. This will help you to reach more of your subscribers and achieve your email marketing goals.
Here are some additional tips for successful email marketing:
- Create high-quality content. Your email content should be informative, engaging, and relevant to your subscribers’ interests.
- Segment your email list. This will allow you to send targeted emails to different groups of subscribers.
- Personalize your emails. This will help to make your emails more relevant to your subscribers and less likely to be flagged as spam.
- Test and optimize your email campaigns. Track your email deliverability, open rates, click-through rates, and unsubscribe rates. Use this data to improve your email campaigns over time.
Email marketing is a powerful tool that can help you to reach your target audience and achieve your business goals. By following the tips in this blog post, you can create and send effective email campaigns that will help you to grow your business.

How to Create a Blog Post on WordPress: A Step-by-Step Guide
Introduction:
In today’s tutorial, we will walk you through creating a blog post using your WordPress site.
1. Accessing Your Posts: Navigate to your WordPress dashboard. Click on the ‘Posts’ option to view all your existing posts. This will display both published posts and drafts.
2. Starting a New Post: Click the ‘Add New’ button. A new post interface will appear.
3. Using the Post Editor: While there are many page builders like Divi, we will stick to the default WordPress editor for this demonstration. Begin by adding a title for your post.
4. Writing Your Post: Simply start typing in the provided area. A new feature that can be particularly helpful is the AI Assistant integration. You can request the AI to generate content. For instance, you could request, “Create a blog post about the importance of eating healthy every day,” and it will draft content for you. Ensure you review the AI-generated content, make necessary edits, and add your unique touch.
5. Adding a Featured Image: Every engaging blog post should have a captivating image. Click on ‘Featured Image’ on the right panel. Choose ‘Set Featured Image’. You can either upload a new image, use free photos provided, or select one from your media library.
6. Previewing and Publishing: Before publishing, you might want to preview your post to see how it will appear to readers. Click ‘Save as Draft’ and then select ‘Preview’. If you’re satisfied with the post, click ‘Publish’. This will make the post live on your website.
7. Deleting or Trashing Posts: Navigate back to ‘Posts’ in your dashboard. Find the post you wish to delete. Click ‘Trash’ to remove it.
8. Viewing Your Blog: To see all your published posts, go to your main website URL and append ‘/blog’ to the end.
Conclusion:
Creating blog posts on WordPress is a straightforward process, made even more efficient with features like the AI Assistant. We hope this guide has been beneficial, and encourage you to keep sharing your insights and stories through your blog. Happy blogging!

EZMS Onboarding – Reputation Management
Introduction
In today’s digital world, your online reputation is pivotal. Google reviews act as a primary ranking factor when it comes to search results. This guide delves into a feature that helps manage and amplify your reputation — Reputation Management.
Importance of Google Reviews
- Visibility: The more five-star reviews your business has, the higher you rank on Google.
- Trust Factor: Real-time reviews build trust among potential customers.
- Beating Competitors: Many businesses still don’t capitalize on Google reviews, giving you an edge if you do.
Reputation Management Feature Overview
This feature enables:
- Prompting for Reviews: Ask your customers for reviews seamlessly.
- Automation: If you use Sales or Marketing Center, automate review requests.
- Gamification: Set review goals and monitor progress.
How to Request Reviews:
- Navigate to the ‘Reputation’ section.
- Click on ‘Send Review Request’.
- Choose the customer’s name, and select whether you want to send the request via phone or email.
Promote Your Reviews:
- Capture reviews directly from Google and embed them on your website using the widget provided.
- Genuine reviews provide authenticity over static testimonials.
Batch Review Requests:
- Navigate to ‘Contacts’.
- Select all contacts you wish to ask for a review.
- Click on the star icon and select ‘Send Review Requests’.
Automation & Integration
For higher-tier users, this feature can be integrated with your point of sale system. After a customer makes a purchase, set a timer for when they should receive the review request, making it a hands-off process.
Conclusion
Reputation Management isn’t just a feature; it’s an essential tool for any business hoping to thrive in the digital age. The more positive reviews you amass, the more visible and trustworthy your business becomes. With this guide, maximize your potential and see your business climb the Google ranks!
For further assistance, reach out to our support team. See you in our next feature walkthrough!

EZMS Onboarding – Text to pay
Introduction
Hello and welcome back! In this guide, we’re diving deep into our last, yet vital feature – Text to Pay. A feature that brings ease to payments and is sure to revolutionize how you manage transactions.
Why Text to Pay?
- Convenience: If you’ve set up Stripe as initially suggested, this is the ideal way to request swift payments.
- Integrated: A feature rooted in Stripe but intricately woven into our system.
- Quick Payments: Directly request payment through text messages.
How to Use Text to Pay
- Accessing the Feature: Navigate to the messaging interface.
- Requesting Payment: Click on the option to request a payment or Text to Pay.
- Invoice Details: Fill in the product/service details, invoice number, and set an expiration date for the payment link.
- Generate & Send: Once all details are filled in, generate the payment link and send it to your client or customer.
Benefits
- Direct Linking: Customers receive a direct link to Stripe to process the payment.
- All in One: Functions similar to popular payment apps but with a business angle.
- Integrated Payments: Ties seamlessly into your bookkeeping system.
Bonus Feature – Full Invoicing Solution
Although the focus is on Text to Pay, our platform offers a comprehensive invoicing solution:
- Access Invoicing: Navigate to ‘Payments’ to access the full suite of invoicing tools.
- Feature-Rich: Set up one-time or recurring invoices for your customers.
- For Advanced Users: Full invoicing is available in the sales center.
Conclusion
Text to Pay is a prime example of simplicity and functionality combined. Not only does it simplify payments, but it also integrates perfectly with other financial tools. But remember, tools only shine when used strategically.
For assistance in leveraging the full potential of the tools or advice on marketing strategy, reach out to our dedicated team at supported eztransition.com. We’re here to help you elevate your business each month.
Looking forward to seeing you advance and prosper. Until next time!